
UPDATE January 21, 2017!!! – Rudder bearing installation, see the new post for more information: Update
What a process… I had reached out to Van at Seawind Catamarans for assistance on how to remove the rudder bearings. But I suppose I should start from the beginning – for a while now I have had a vibration when making a sharp turn and on the passage down the Pacific coast with the engine running every so often there would be vibration, noise, and rattling which was disconcerting. En route a few times, I checked things with my GoPro and didn’t see any major issues and figured it must just be the rudder bearings getting more loose. Another item added to the list.
After the haul out in La Paz I was able to quickly and easily drop the rudders, this started with removal of the rudder interconnect brackets.
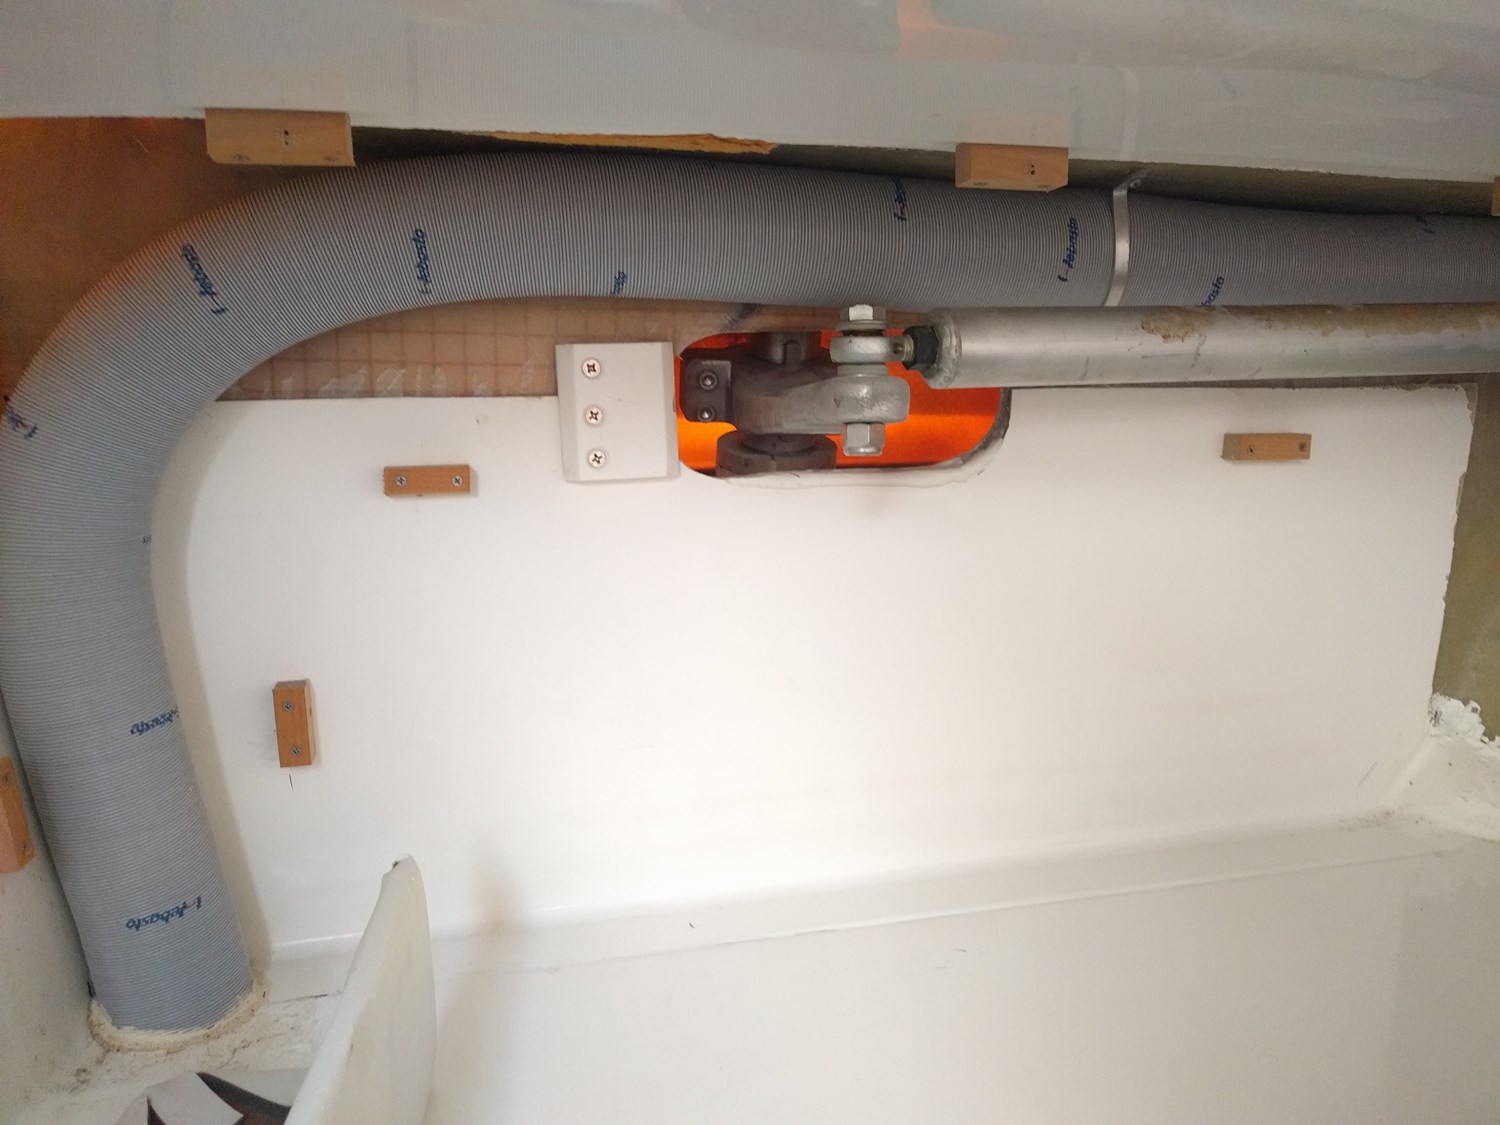
Starboard berth with fiberglass covers removed to expose rudder connection
I marked the location of the bracket, the collar, and labeled which side the rudder belongs to with a marker. Dropping the rudders involved removing the four bolts (8mm Allen) holding the bracket that connected to the rudder interconnect to the rudder tube. With that out of the way I loosened the bronze rudder collar (5mm Allen), while I had two guys holding the rudder so that it did not crash into the concrete below.
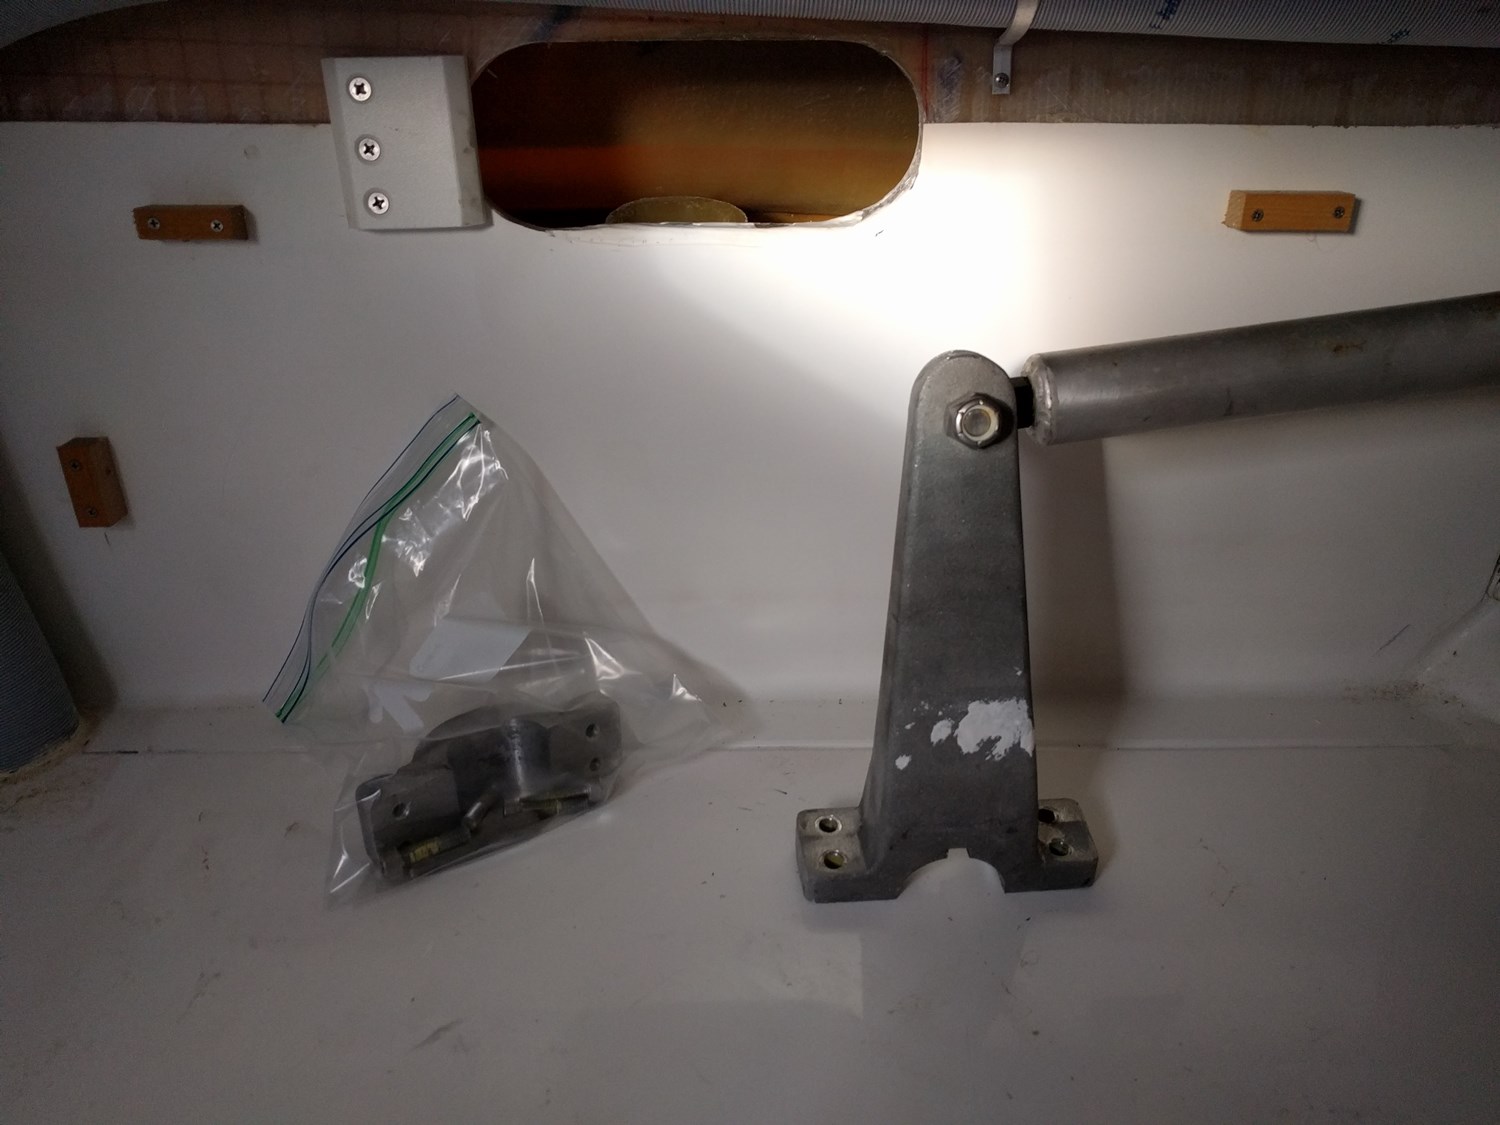
Rudder interconnect bracket
Twenty minutes later step one was checked off the list with two rudders safely on the ground.
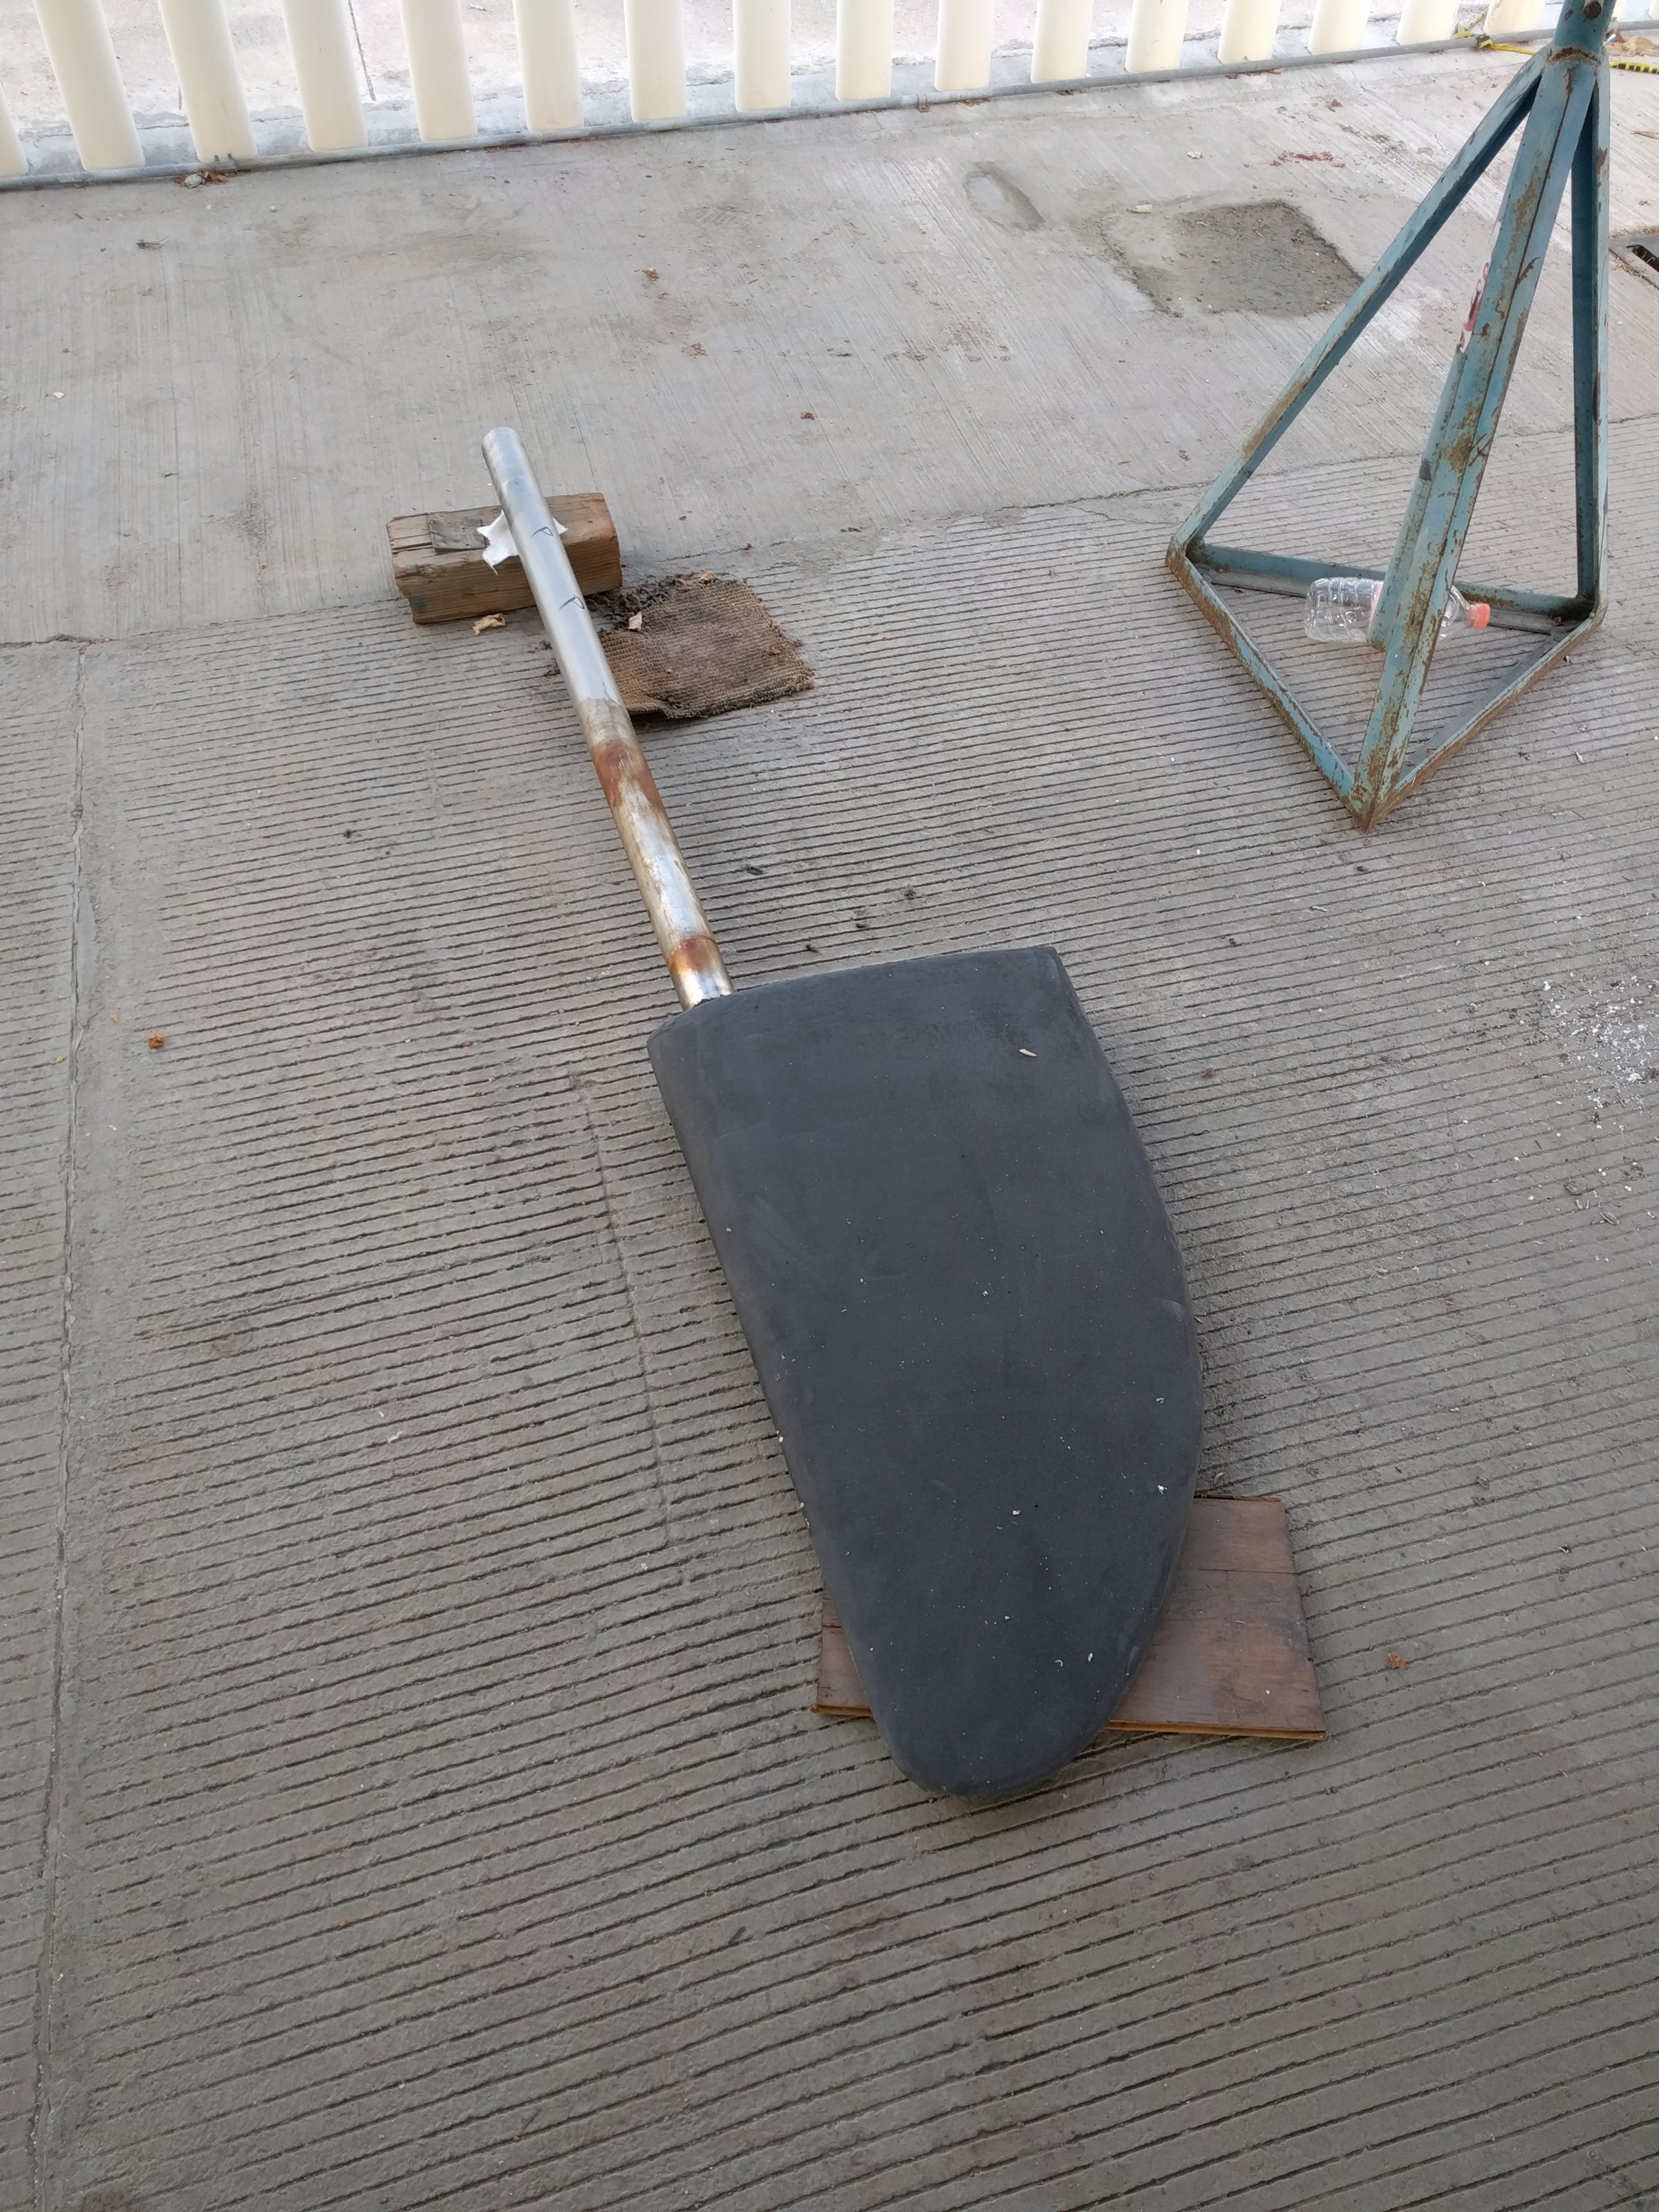
Dropped rudder
Back to my exchanges with Van, she responded quickly to my email with, “The bearings are inside a fibreglass tube and can be removed with some force.” Still not feeling confident in the process I fired off a second email asking for more clarification and a few days later Van got back to me with, “Bearings are inside a fibreglass tube and can be pushed out with some force then replaced with some grooving on the outside to form a key and then glue into place using a epoxy glue.”
Admittedly I am as slow learner and asked yet more follow up questions, to which I received, “The bearings can be pushed on with some sharp hits with a hammer. To replace bearings use a marine epoxy like west system or epoxy gel type glue.”
Okay, I suppose I can give this a try. I decided it best to start from the bottom, but how are the bearings secured? It looked like there was possibly fiberglass on the bottom of the boat and the bearings needed to be pushed up into the fiberglass rudder tube and removed from the top. This did not leave much area to apply force but with a hammer and screwdriver I gave some “sharp hits.” Nothing. Nada, Nope.
Out came the razor blade and I gingerly cut away bottom paint and fairing material bit by bit until I was sure that I wasn’t cutting into any fiberglass. I cleared out the material until the entire bearing was exposed.
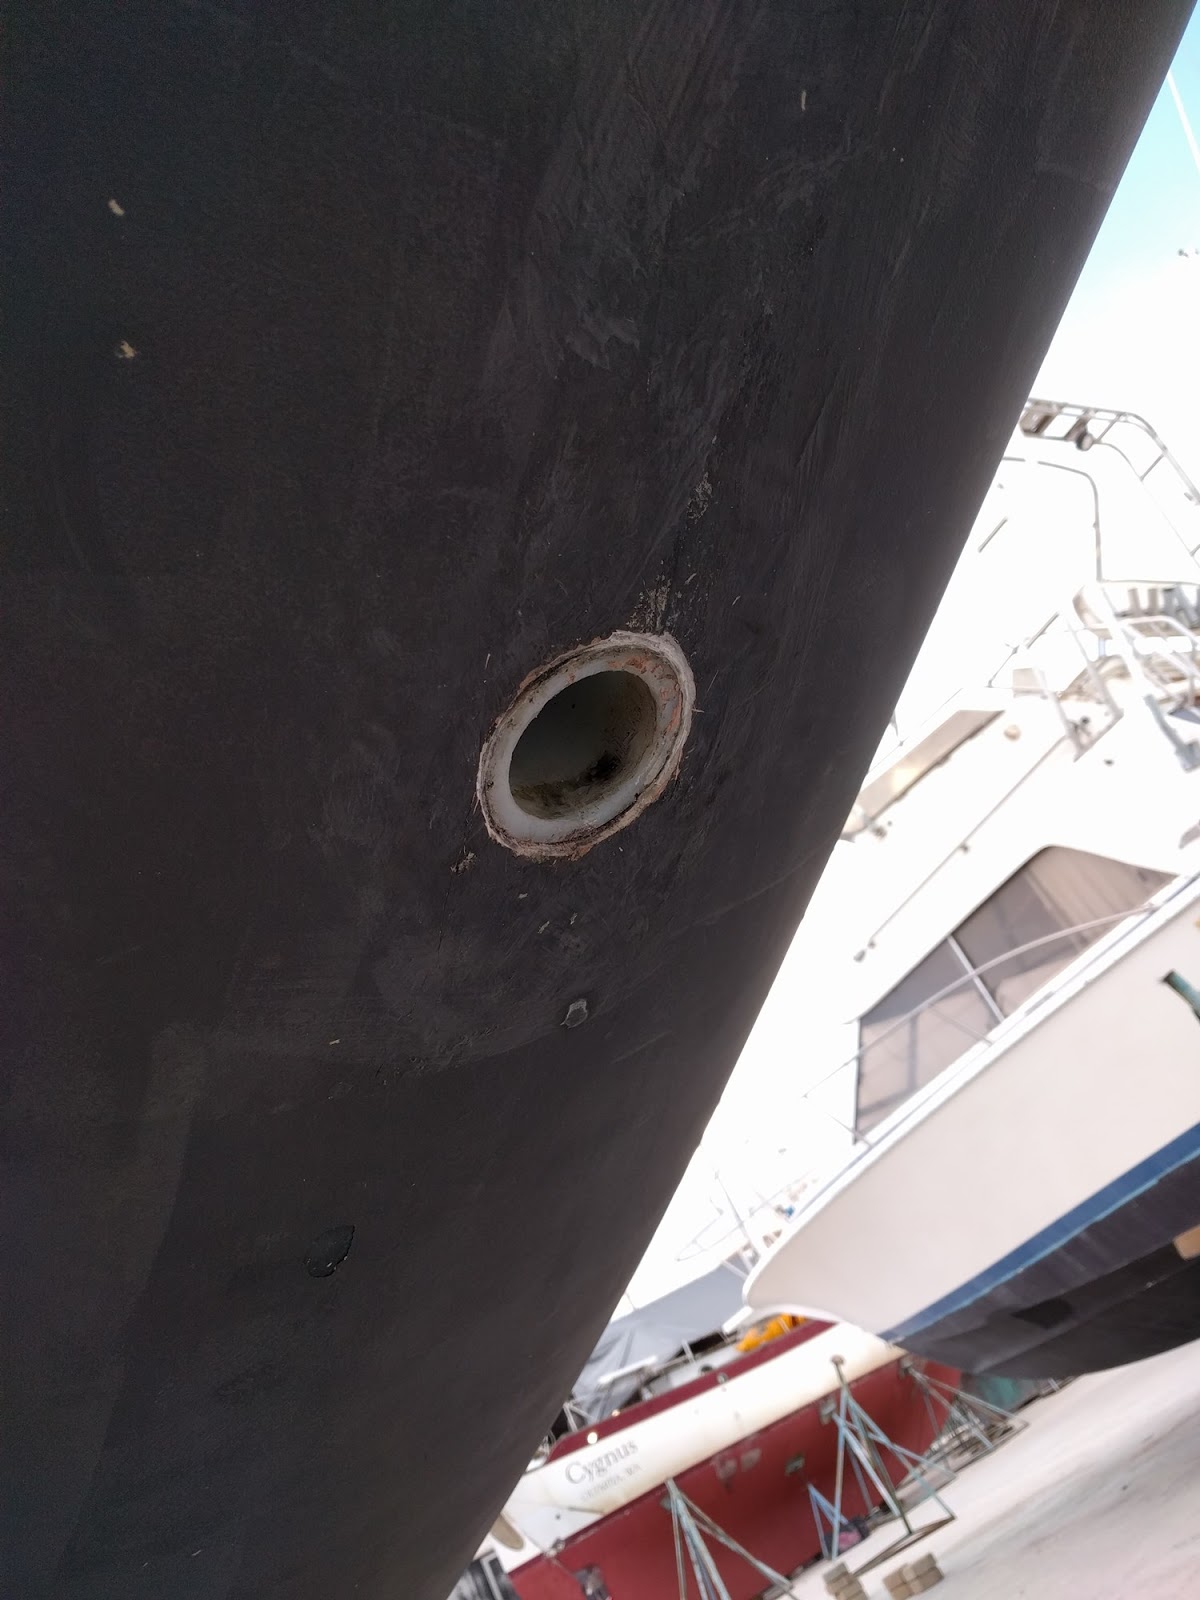
Exposed rudder bearing
More sharp hits and still nothing. Maybe the Port side will be easier, I thought. Over there I repeated the process with the razor blade and applied more hammer with the same result.
After over an hour of sweating and awkward positioning of my body I decided I needed a new game plan. Off to Home Depot to try to find something that will apply a more even force than a screw driver or a block of wood. Not knowing what I would find, I ended up with some thick walled PVC tubing, PVC couplers, and various fence post caps (to increase the diameter of the PVC tube to better match the rudder bearings).
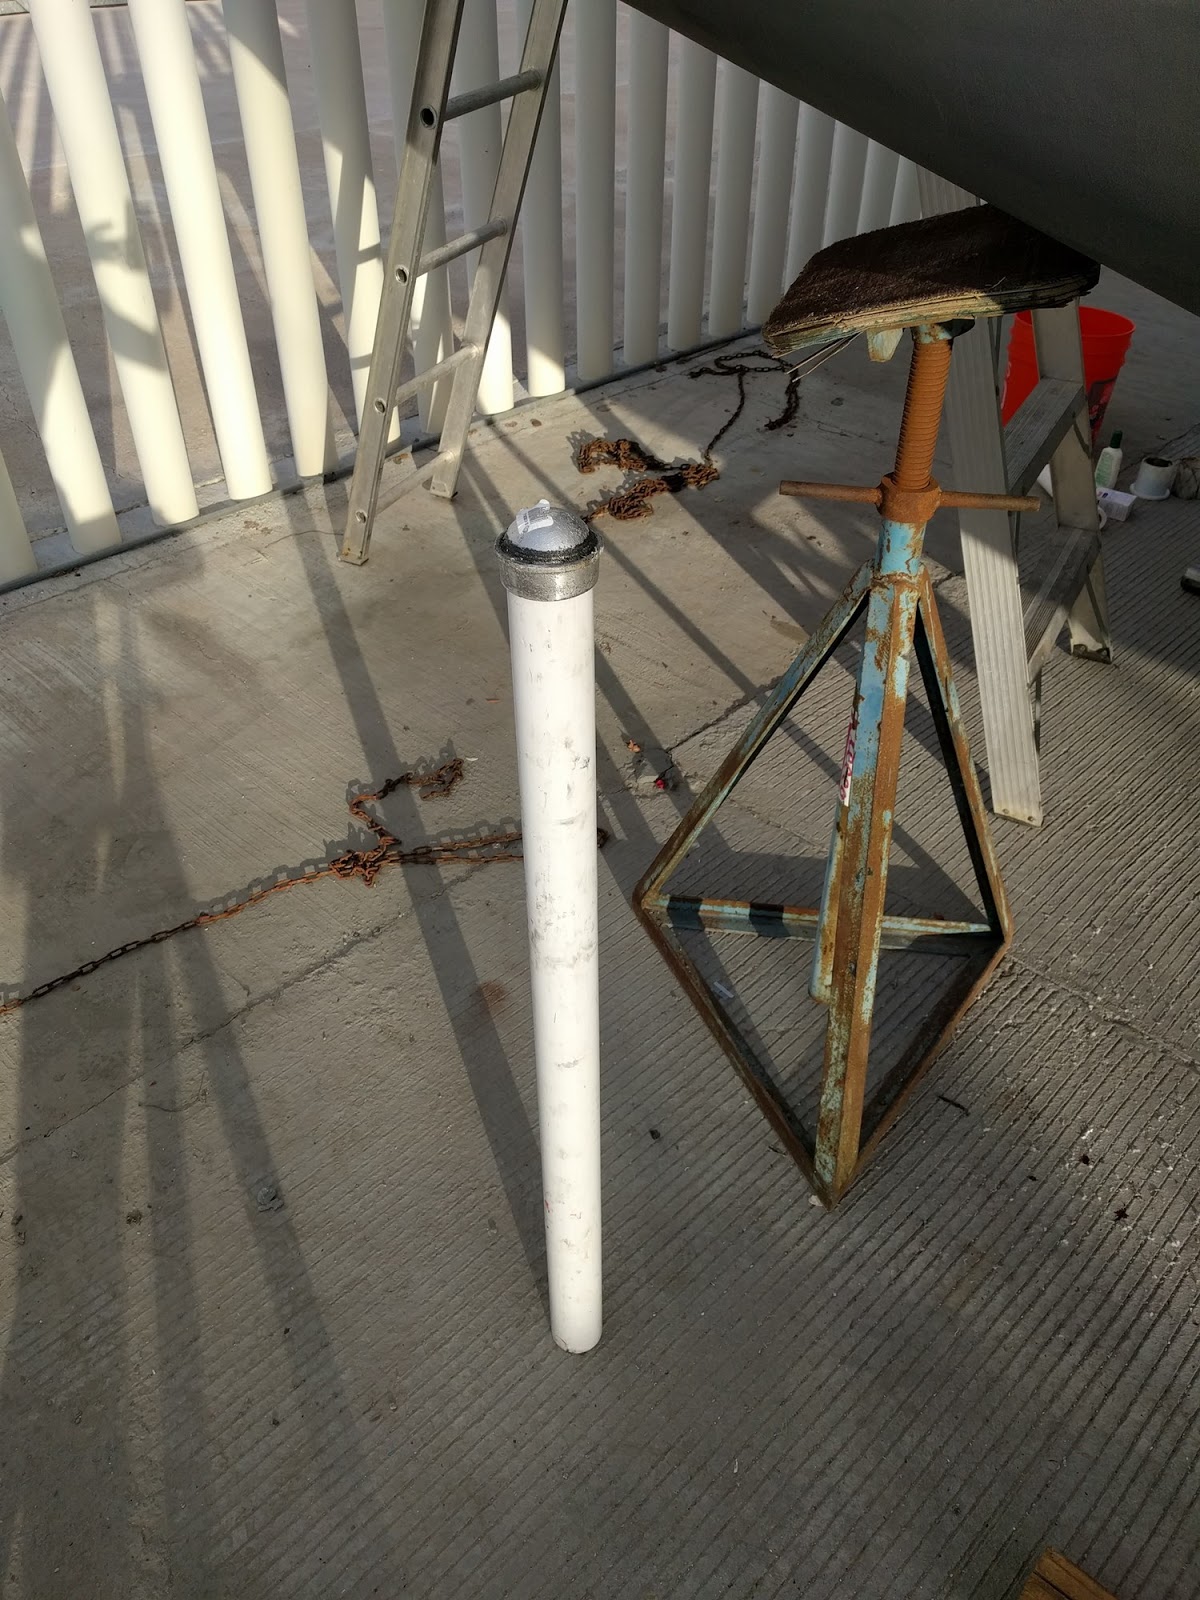
PVC tube with fence post cap, the perfect size to hammer on a rudder bearing
Back to the marina, I proceeded to use my newly acquired supplies to apply yet more sharp hits. Fuck me. Nothing. Another hour past with nothing to show for it but a pool of sweat and fear that I wouldn’t get the bearings removed before my flight home the next day.
Out came a jack stand, maybe that would be the ticket. It took Vicki to hold it at the correct angle as I cranked up the pressure. I put as much force and I felt would be safe, but still no progress. Switched to the other side with the same result. At this point I was over four hours into the process and had basically zero progress. No bueno. My stress level was raising and I had a big list of items to complete before I left the boat for two months so I put aside the rudder bearings and went to check off other projects, but not until after sending another email to Van and a panicked email to my fellow Seawind owner Dave on Nimrod who had his bearings replaced earlier this year.
After calling it at day at 19:30, Vicki and I headed to dinner. About halfway through the meal I had a response from Dave. He was waiting to clear back into Australia after ten days off the grid – very lucky timing – he gave me the name and phone number of the group who worked on his boat. I reached out to Watson Marine Engineering on the Gold Coast of Australia using Viber (what would this have cost me before internet calls, I don’t want to know) and one transfer later I had an incredibly friendly and helpful bloke who explained to me the process they used. I cannot express how much I appreciate the time he took to talk with some guy calling from halfway around the world. Wow. And for Dave, who so quickly responded, another super great guy! Armed with a new approached I felt there was still a chance I could get this completed before heading home.
One restless nights sleep, I got up around 4:00 to charge my tool batteries and 6:30 the next morning I was back in the parking lot of Home Depot. As the door was unlocked I rushed in to buy reciprocal saw blades. Armed with 6 and 8 inch blades (use the 6 inch) I was back to the boat by 7:15.
The process from Watson’s was to carefully cut out part of the bearing and then work the bearing loose. On the starboard hull I made two vertical cuts through the bearing about two inches apart being careful to not cut into the fiberglass rudder tube.
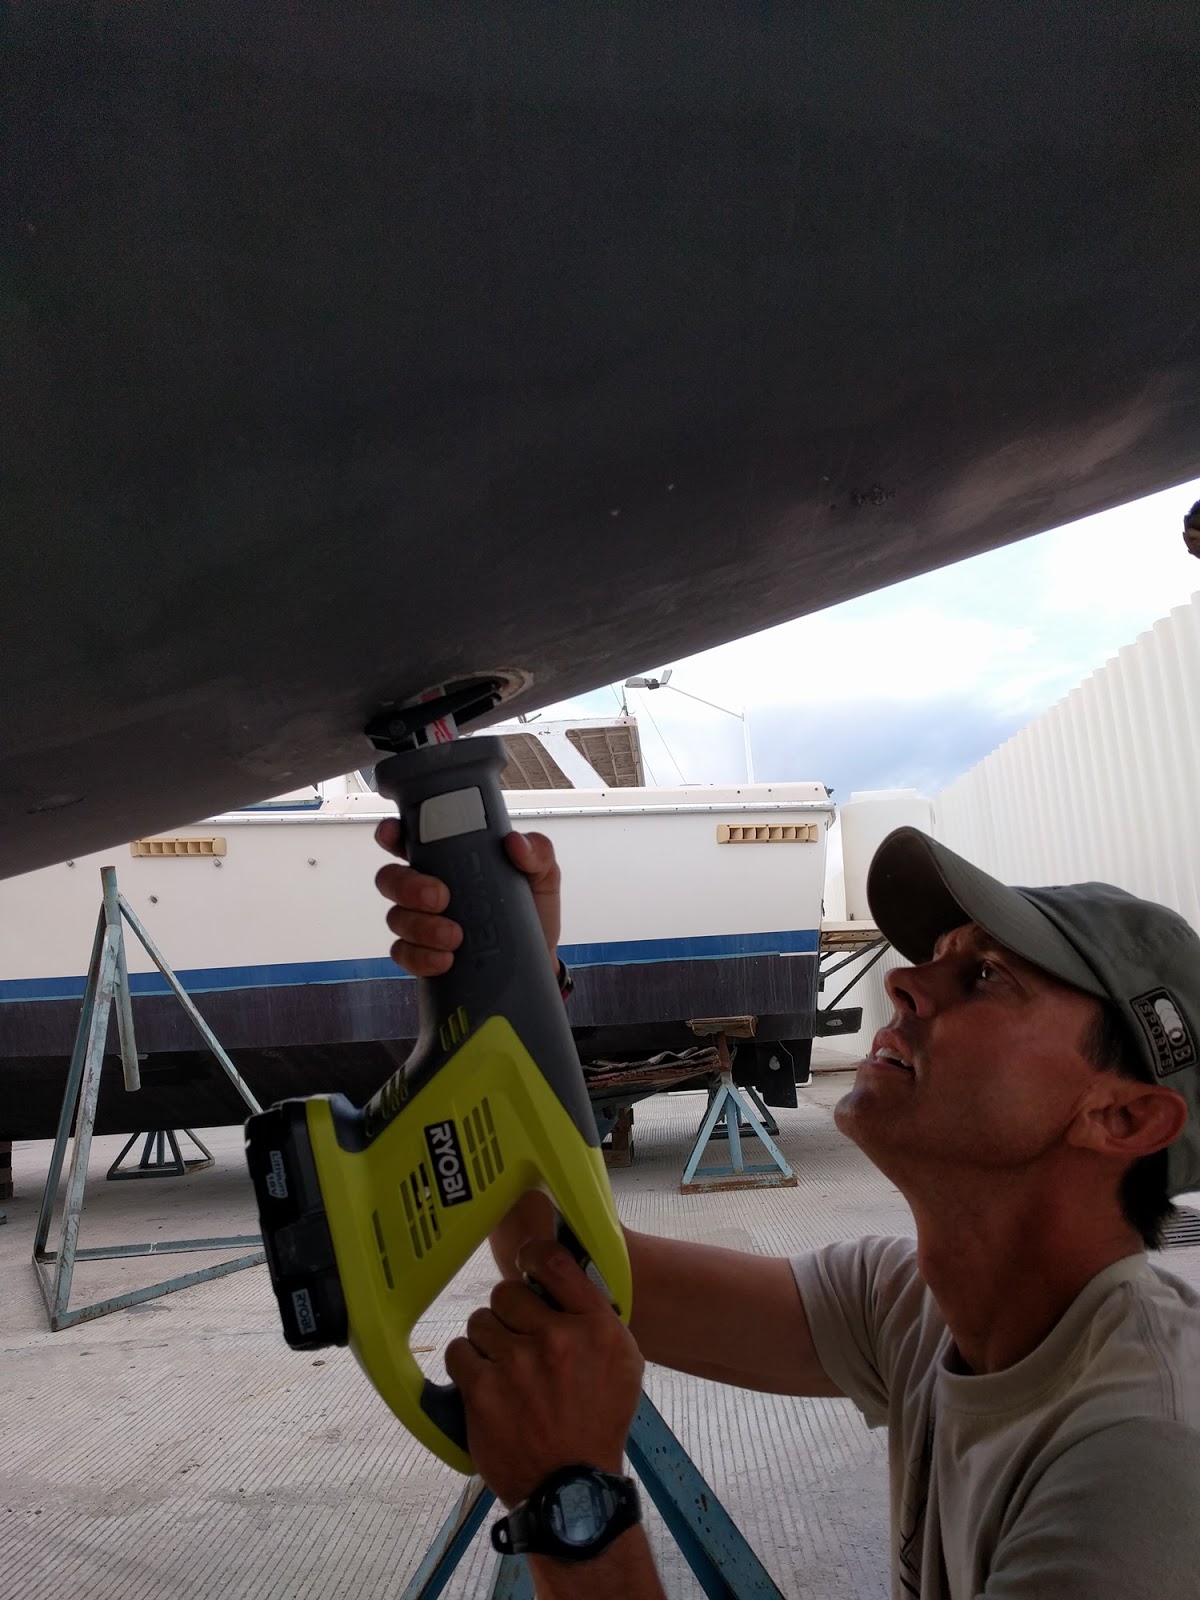
Cutting out a piece of the rudder bearing
Then with a screwdriver and hammer, I carefully worked out the cut piece, breaking the epoxy bond.
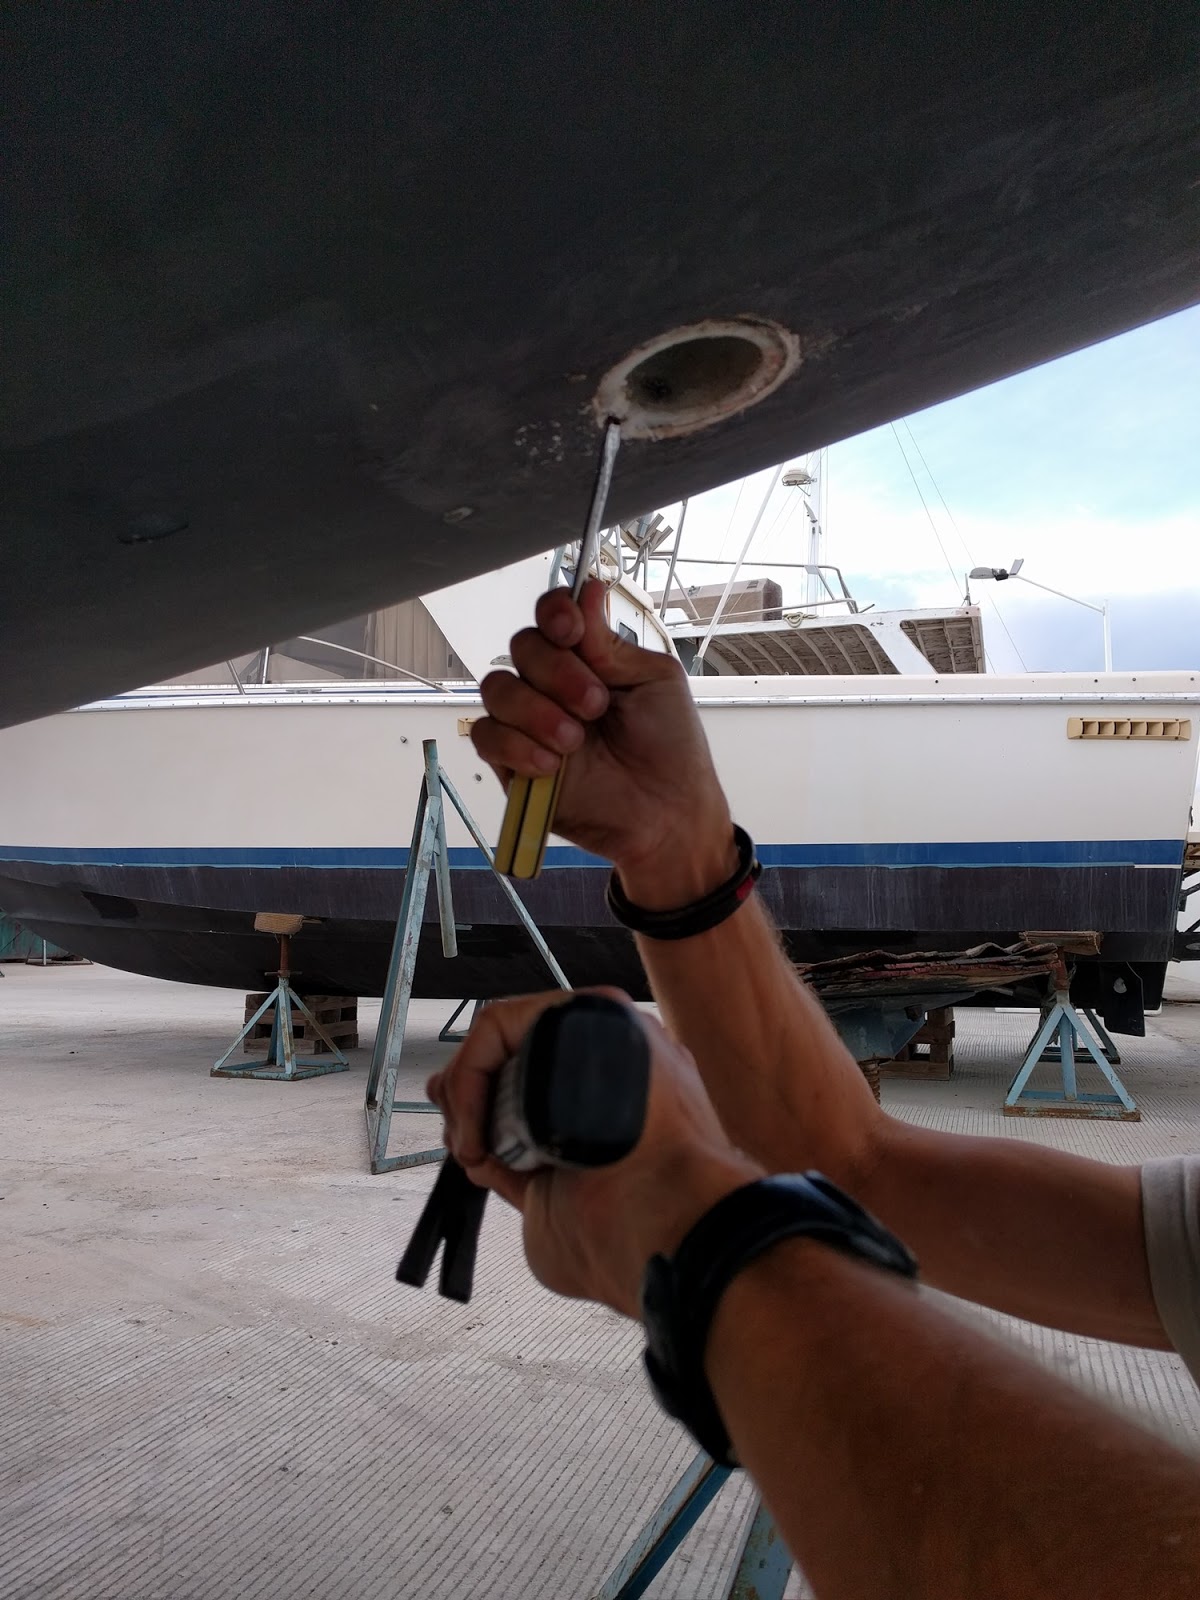
Breaking the piece free with a hammer and screwdriver
Finally switching to channel locks, I twisted the piece free and out of the rudder tube.
Whew, finally a bit of success and confidence that I can at least remove one of the bearings – even if it was destroyed, forcing my machine shop to work off of a Seawind drawing and not an actual sample.
With the piece out, I was able to use my screwdriver to break the epoxy holding the rest of the rudder bearing in place and remove it completely.
Bottom bearing removed, it was now time to start on the top rudder bearing. This bearing has a lip that the rudder collar (and rudder) ride on, so it would have to come out of the top of the fiberglass rudder tube. I pulled out my PVC tube/fence cap and slid it up into the tube. With Vicki holding the PVC tube up against the rudder bearing I hammered away with a piece of 4×4 lumber.
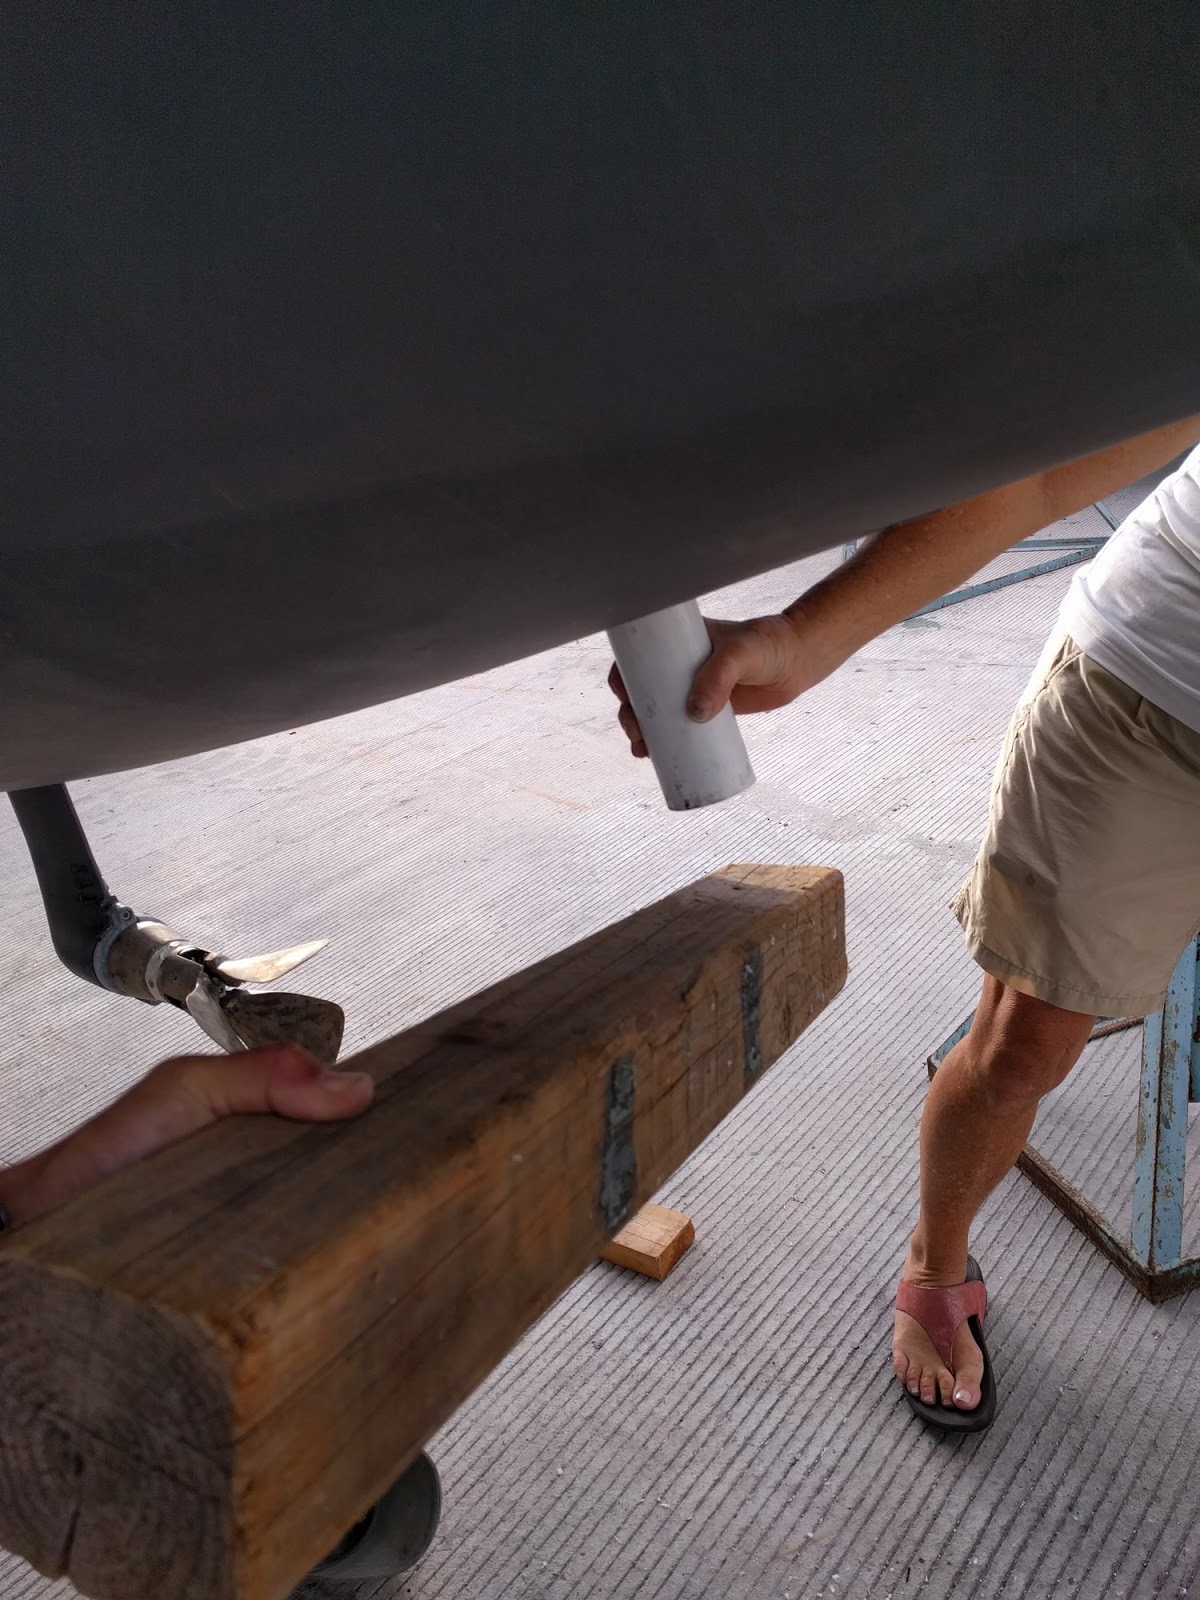
Popping out the top rudder bearing by brute force
After a good 20 wacks I went inside the boat to see that the bearing was up about half an inch, so it was working.
More wacking and finally out popped the rudder bearing in one piece. All told it took about twenty minutes to get the starboard bearings removed. A far cry from the hours of zero progress the day before. Goes to show the right process and things go much smoother.
We repeated the process on the port side with only one change (smaller first piece removed) and one minor hiccup – as Vicki went to adjust her grip, and before I noticed, I swung the 4×4 giving her a bit of pinched, torn skin. She donated some blood to the project. I felt horrible, but thankfully it wasn’t a serious wound, albeit a painful, throbbing one.
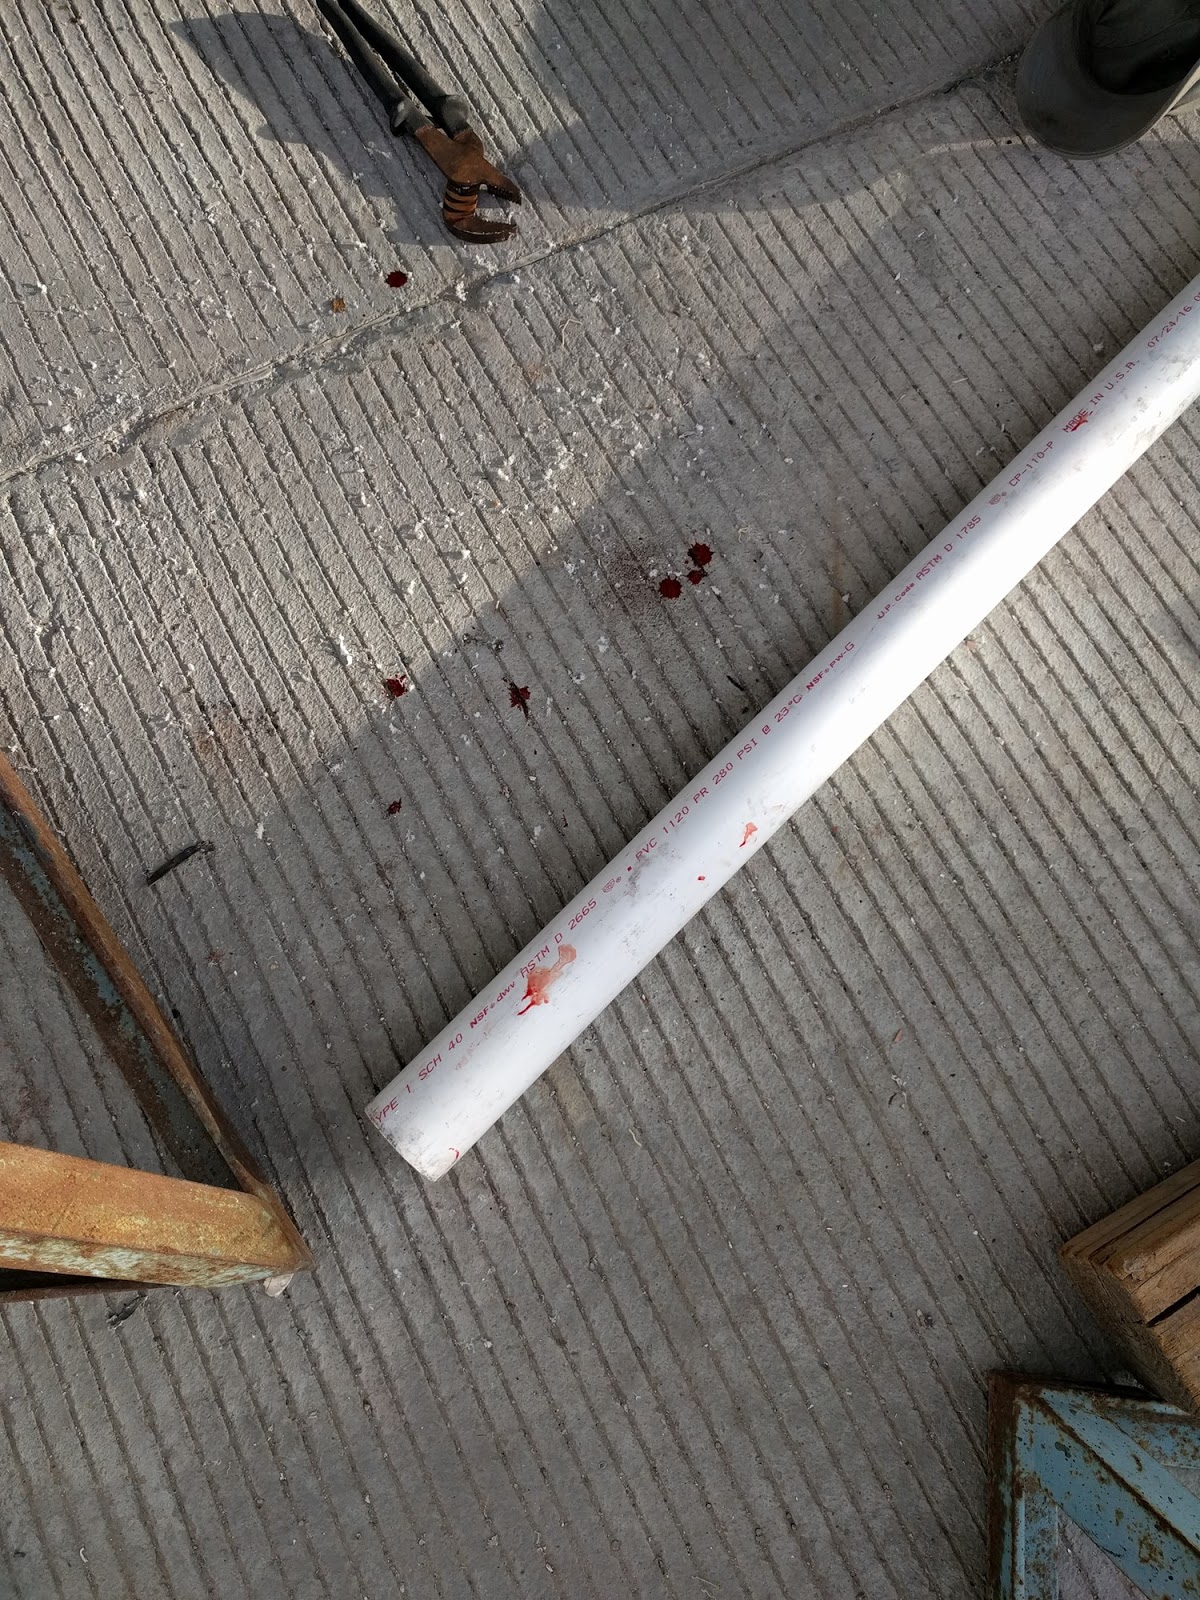
Vicki’s donation to Strikhedonia, thank you and so sorry Vicki!
We repeated the process on the other side and in about thirty minutes had all four bearings on the ground and out of the boat. Whew, that was such a major relief and beyond my expectations twelve hours earlier.
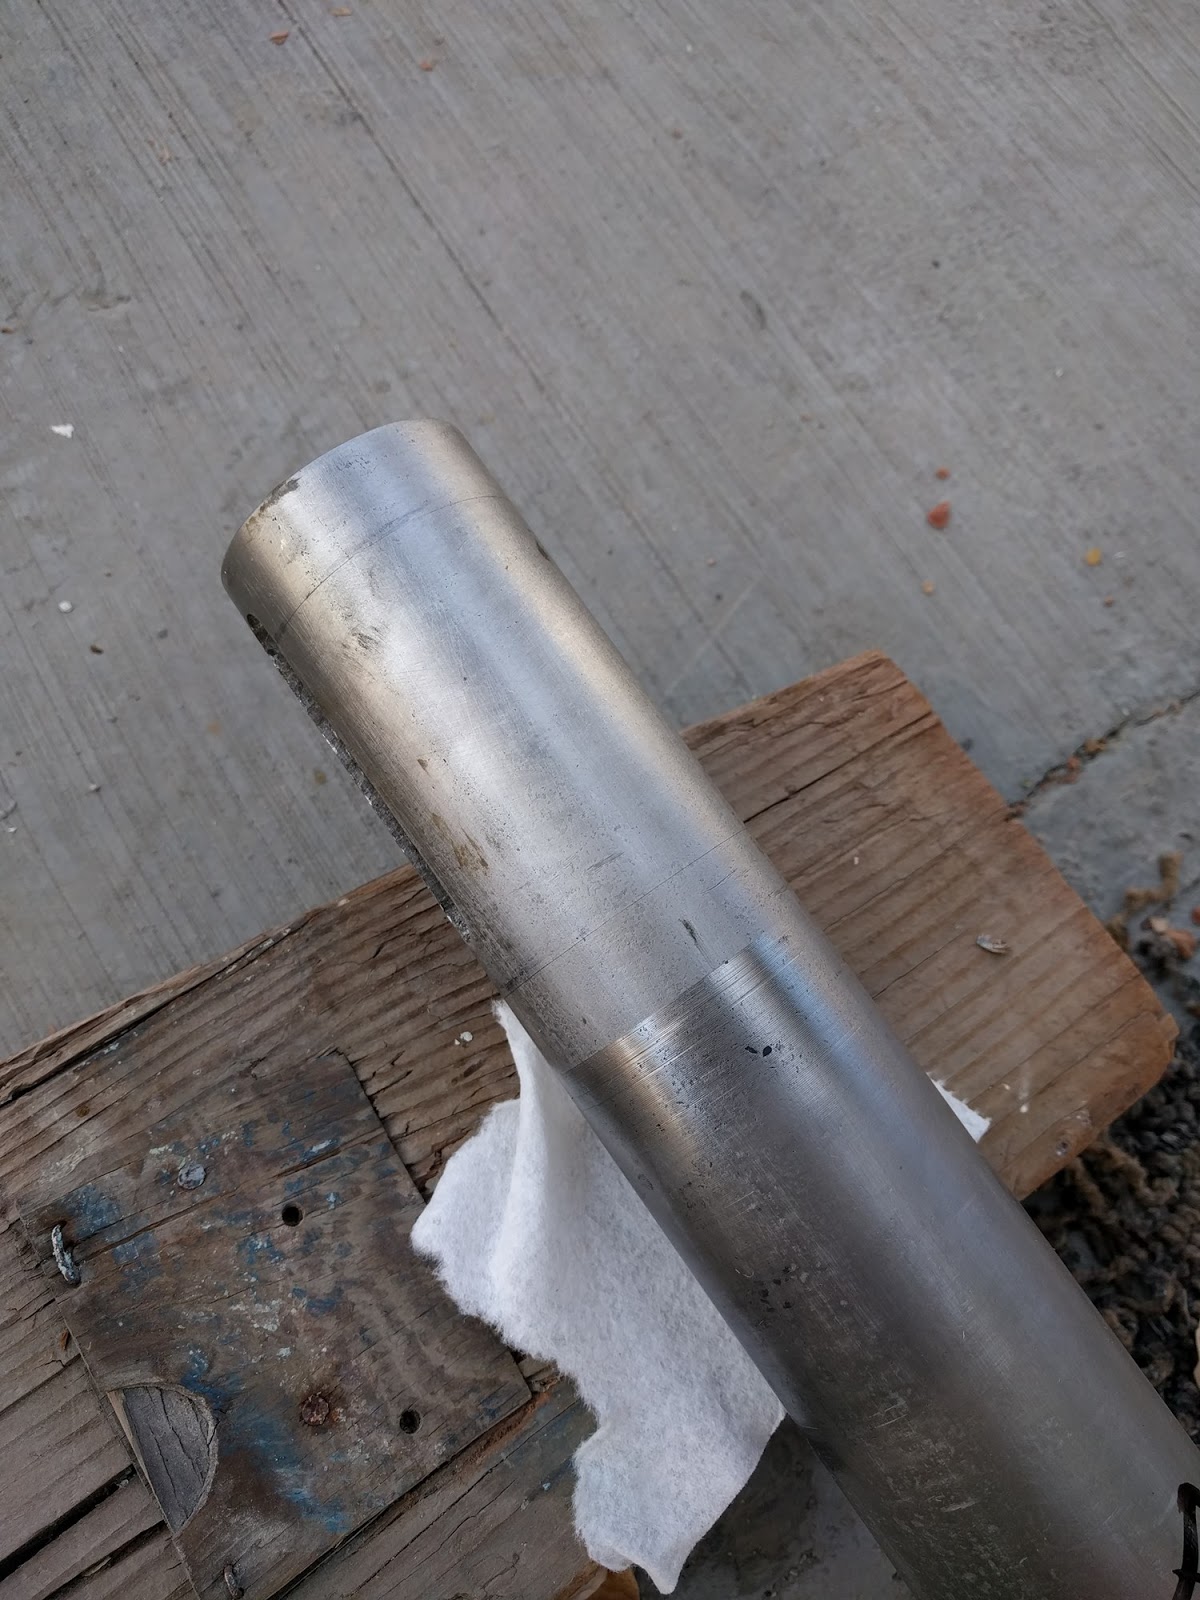
Marked rudder post, check out the scoring from the bearing…
I added score marks for the rudder bracket and collar since the marker was wearing off. The bearings came out well and should be good samples for machining the new parts.
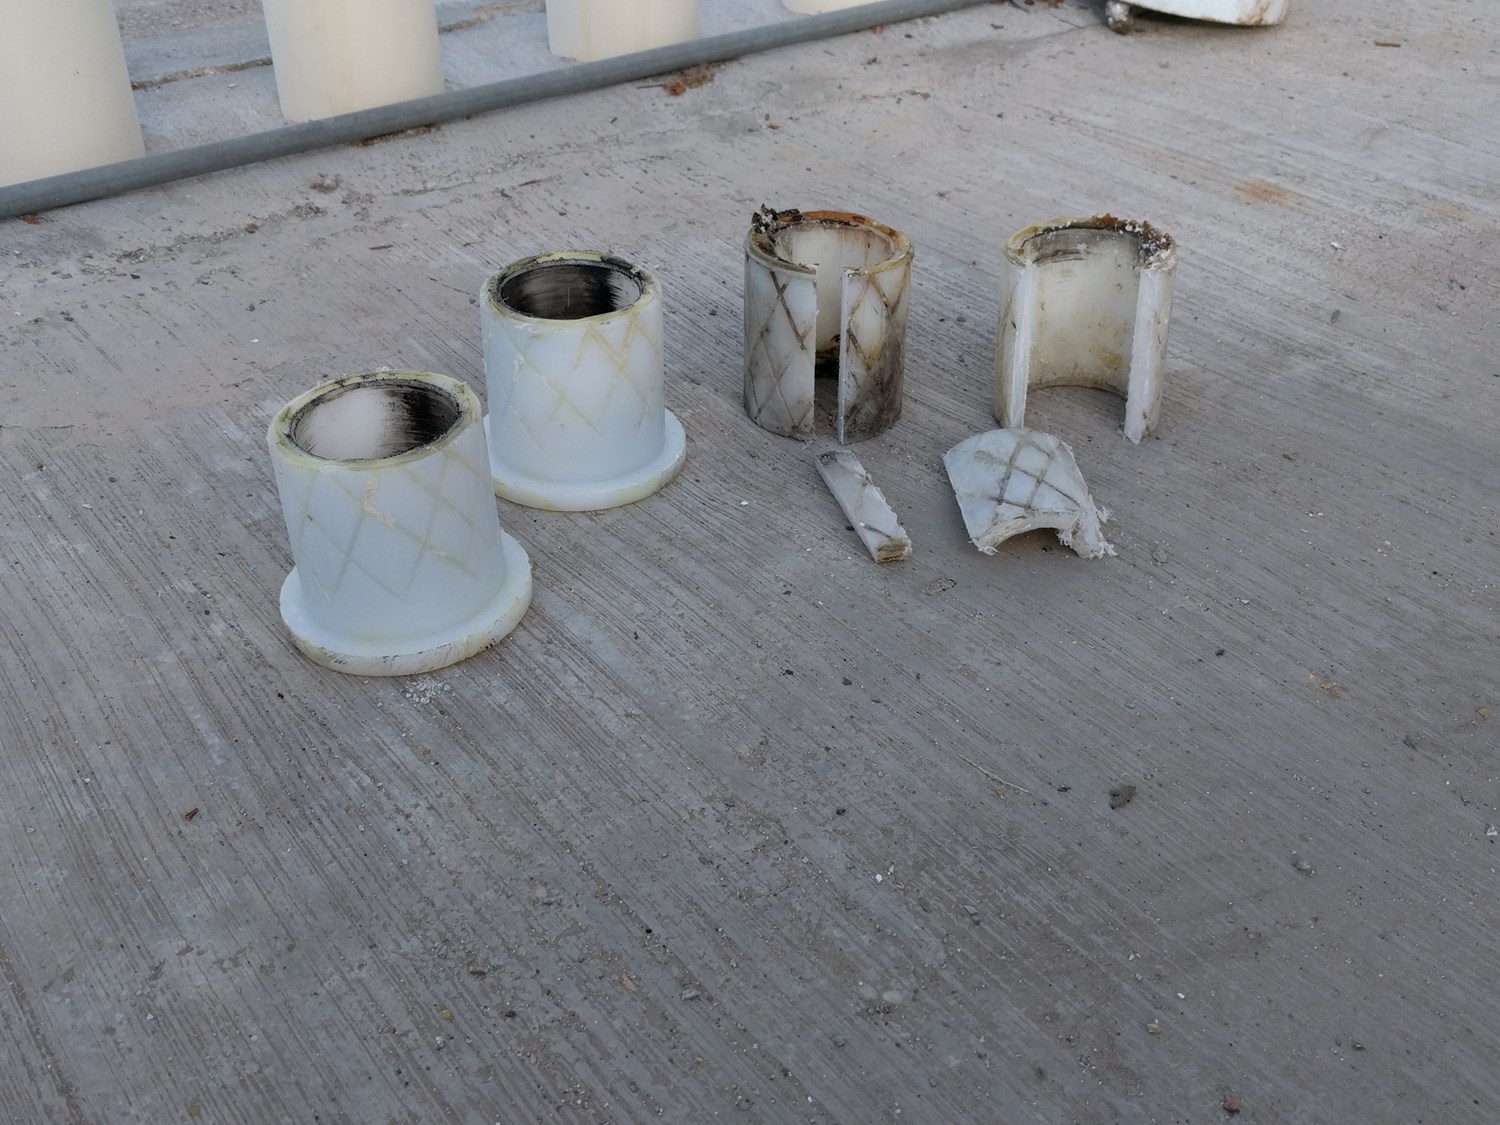
Just a wee bit of work to remove these guys.
Our seawind is a 2008 what year is your ?
Ours is a 2008 too.